Types of cameras
Labelled SLR Camera
Types of lens
 A wide angle lens can be great for exaggerating depth and relative size in a photo. A wide angle lens refers to a lens where its focal length is less than around 35mm which is substantially smaller than the focal length of a normal lens. This type of lens allows more of the scene to be included in the photograph which is useful for architectural, interior and landscape photography. In this example, they have taken a low angle shot pointing to the sky, which manipulates the height of the buildings.
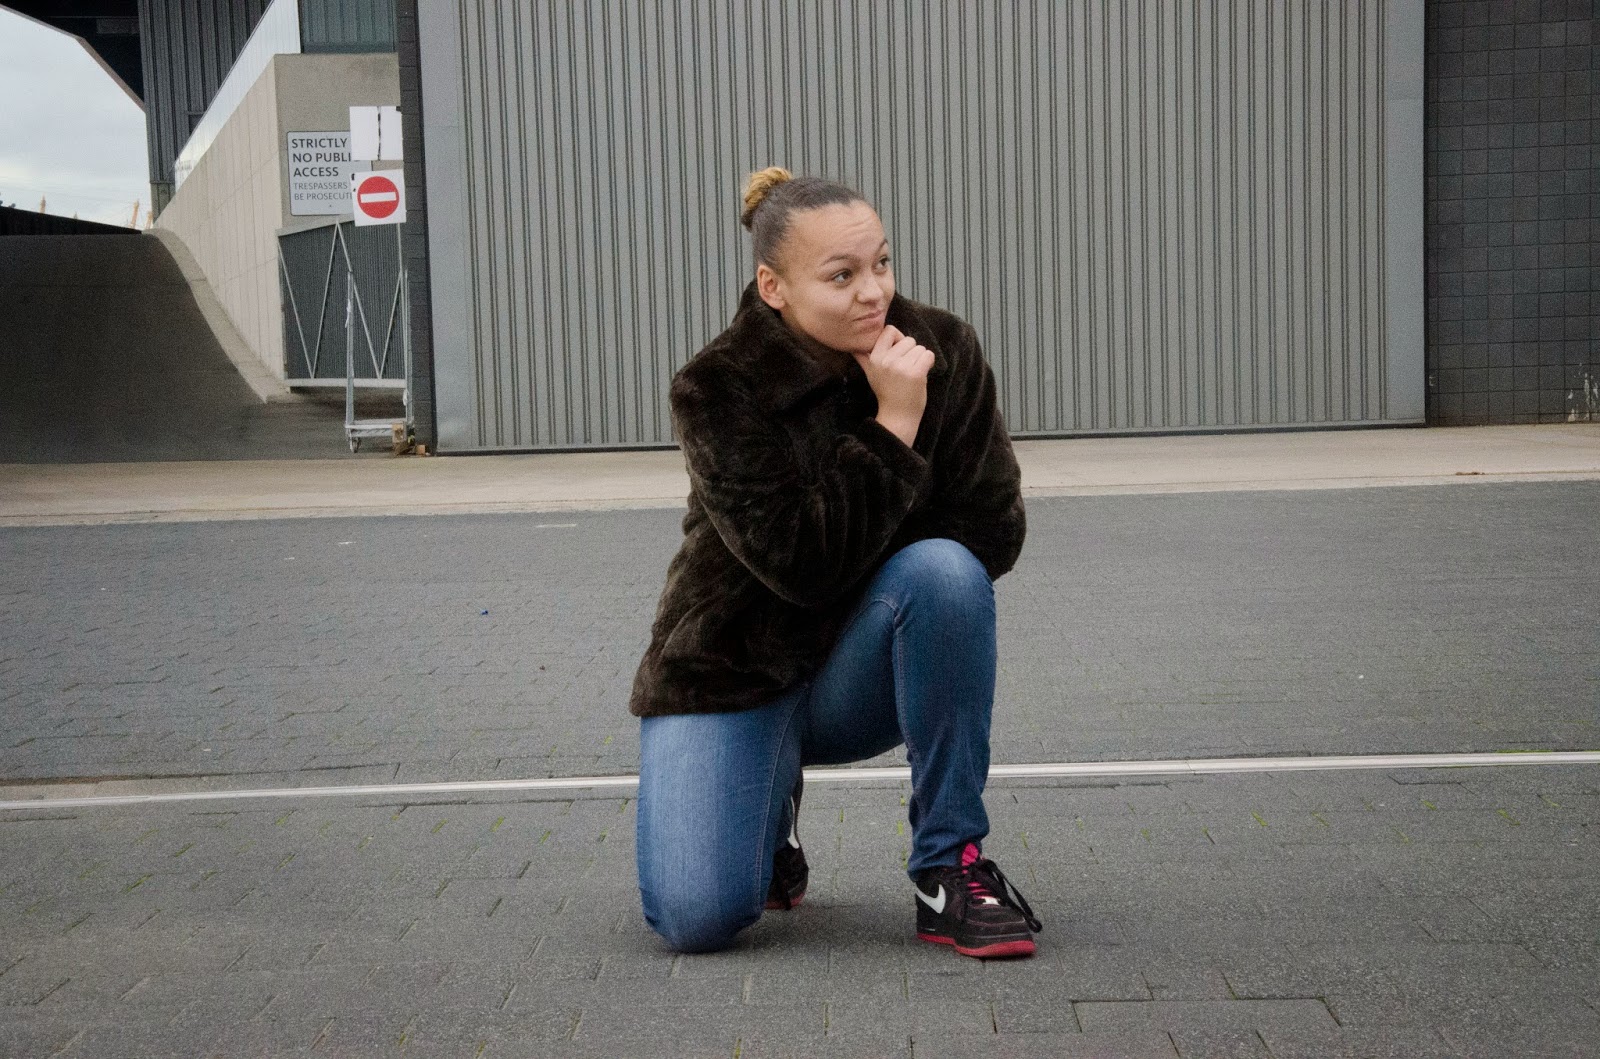
Telephoto lens is a type of a long-focus lens in which the physical length of the lens is shorter than the focal length. Using telephoto lens to zoom will both isolate your subject and draw attention to it. When you zoom in on the important details, your subjects will be the main point of the image. It also enhances the colors of the main subject in this image for example.
A long-focus lens is a camera lens that has a focal length longer than the diagonal measure of the film that receives its image. It is used to make distant objects appear larger with the magnification increasing as longer focal length lenses are used.
Macro lens is a lens that is suitable for taking close up photos. These lenses have a long barrel for close focusing and optimized for high reproduction ratios.
Film types and storage device for photography
Photographic film is a strip of transparent plastic coated on one side with a gelatin emulsion that contains tiny light-sensitive silver halide crystals, of which the sizes and other characteristics of the crystals determine the sensitivity, contrast and resolution of the film.
The first commercially successful colour 'film' was the Lumière Auto-chrome. It was a glass plate product introduced in 1907 which was expensive and not sensitive enough for
hand-held "snapshot" use. Film-based versions were introduced in the early 1930s and the sensitivity was later improved. Colour film uses at least 3 layers of silver salts. Dyes are used which absorb to the surface of the silver salts which make the crystals sensitive to different colours. It is typical for the blue sensitive layer to be on top, followed by green and red layers. When the film is developing, the exposed silver salts are transformed to metallic silver. The by-products of the development reaction simultaneously combine with color couplers from either the film itself or in the developer solution to form colored dyes. The by-products are created in direct proportion to the amount of exposure and development therefore the dye clouds formed are also in proportion to the exposure and development. After the development, the silver is converted back to silver salts in the bleach step. It is then removed from the film in the fix step. This leaves behind only the formed color dyes, which combine to make up the colored visible image.
Another type of film is black and white. The image on black and white film negative is actually the inverse of the actual image. Black and white films are also made of three layers. First, there is a light-sensitive emulsion layer which contains silver salt crystals that are able to absorb light and react with a developing chemical to break down into pure silver. And when the silver is removed an image is revealed on the negative. The second layer is of plastic to support the emulsion. The third layer is an anti-halation layer that is used to capture light and stop it from bouncing back to the emulsion. This final layer eliminates blurry images or foggy film. Just like in colour film the amount of silver salt and grain in black and white film decides whether the film is more or less sensitive to light.
A memory card is the general storage device for photographs.A memory is an electronic flash memory data storage device used to store digital information. They can be used for many electronic devices including digital cameras, mobile phones, laptops, MP3 players,tablets and game consoles. It can store data such as text, pictures, audio and video. Memory cards come in different sizes depending on the device your using it for and they can have different storage capacities.
.
Still life photography
Still life photography is the visualization of inanimate objects, mostly groups of objects. Still life photography allows the photographer freedom in the arrangement of the elements in the frame. Photographers work with lighting and the composition of the props in a frame to produce a work of art to their taste.
This photo is a composition of a child's toy ball. The lighting is natural from a window and you can see that the lighting is coming from the right hand side on to the ball. You cant see much of the background which makes the ball look like its disappearing in to the darkness. The dark surrounding adds a sense of mystery to the photo.
This photo was taken in artificial light. The sunglasses where place on a white chair and I took a close up of the glasses. The plain background isolates the subject and makes it look like the sunglasses are floating.
This photo is also taken with artificial light, you can see the reflection of the light in the lens's of the glasses. The bright light makes the main subject, (in this case being the purse and the sunglasses) stand out and brings it in to focus.
These last two photos where taken using natural light which came in from different directions highlighting and shadowing different parts of the composition to create a different and more mysterious atmosphere.
Examples of practices using aperture and shutter speed
This photo was taken late evening when it was actually darker but I used a low shutter speed of around 1/20th of a second. This allowed more light in to the lens thus making the image appear lighter.
This photo shows the use a shallow of depth of field which involves the use of a high aperture. As you can see the subject of the photo (the can) is in focus, but everything else is blurred and not clearly visible.
 This shot uses a low aperture to achieve a wide depth of field, so that there is a sharp focus on a wider proportion of the flowers in the photo.
This photo was taken at a relatively slow speed of 1/40th of a second. A slow shutter speed creates an effect called motion blur where moving objects, in this case the birds appear blurred along the direction of motion.
Dark room Photography equipment
Enlargers
An enlarger is used to project
images from negatives onto enlarging
paper to produce photographic prints from film
or glass negative. They are important in the film photography process. It is
common to see an enlarger in the darkroom environment.You can get an assortment
of enlargers which can become quite costly when they are highly specialized. The
enlarger projects light through the negative with the enlarger usually pointing
down at a flat surface which is designed to accommodate enlarging paper. The
photographer can adjust the focus of the enlarger and the size of the resulting
enlargement. There is also usually room for a filter which can be used to
change the quality of the light reaching the negative for specific desired
effects.
Tongs
Print tongs are used to handle prints after they have been immersed in to the chemicals and being removed from the tray. They can be made from chemical resistant plastic, stainless steel or a popular an inexpensive choice, bamboo.
Developing Tank
A developing tank is a light and air tight container used for developing film. It allows photographic film to be developed when there is daylight. This is useful as most film is panchromatic and can't be exposed to any light during processing. Depending on the size and type, a developing tank can hold one to many roll or sheet films. A film reel holds roll films in a spiral shape. The film is held evenly spaced so that the chemicals in the developing tank reach all of the film. Developer tanks come in two types; plastic and stainless steel.
Contact printing frame
Printing frames are used for alternative photographic processes in which a large-format negative is exposed in contact with a positive carrier. Printing frames brings the negative into direct contact with the paper carrier, pressing them firmly together across the entire surface so that there are no air bubbles.
Print processing trays
The trays are made from a chemical resistant plastic to hold the chemicals for use in the dark room process.
Timer
Timers are used to accurately control the exposure time of an enlarger.
There are typically two switches on a timer. When both switches are turned on, the
light remains on. If only one of the switches is turned on, the enlarger will be on for as long as the timer is set to. Having the light on continually is used for focusing your picture.

A thermometer is a measuring device which is used to measure temperature. The temperature sensor which is the bulb on a mercury in-glass thermometer and ability to convert the physical change into a numerical value from the scale on the thermometer are the two important elements of a thermometer. A thermometer is useful to observe and control the temperature of the chemicals. In B&W photography, a thermometer that’s marked in 2-degree gradations, so you can read it to a single degree Fahrenheit is good enough to use. You also don’t need a thermometer that will cover a huge range. For B&W work, the coldest usable chemical temperature is around 65°F (18.3°C) and tops off around 80°F (26.6°C).
Dark room process
In dark room photography photos are taken in a room that
is completely dark to allow the handling of light sensitive photographic materials,
including photographic film and paper.
Before you start the process it is a good idea to do a test run using test
strips as you don’t want to waste paper as it is expensive. Test strips are a
smart way to test how long you should expose light on to the paper for. The test
strips work by putting the negative in the enlarger, then focusing it and get
it to the right size. Also bring the enlarger down to f8 or f11, with the
aperture somewhere in the middle. The size of the enlargements and density of the
negative will determine what aperture should be used at the start.
Smaller enlargements usually take a smaller aperture and denser negatives
usually require a larger aperture. The test strips are just strips of the
paper, they are placed on the printing easel with metal holders used to hold
the paper in place. The timer is set for 2 seconds to start with, the strips
are covered with a board except one strip is left exposed. Then the board is moved
to expose a second strip and produce a second exposure for another 2 seconds. The
first strip would was exposed first would now have been exposed for 4 seconds
so it will be darker. This process continues until all the strips are exposed
and you can see which exposure time is best.
 To produce a print it is best to set your f stop on the
enlarger to the smallest aperture to ensure you get the best quality. The
negative needs to be adjusted so that you can see the photo you want to print. The negative should be put in the carrier with the emulsion side down, so it should appear backwards, and upside down. Once that is done, close the carrier
and insert it back in to the enlarger. A full piece of paper is then inserted into
the easel. The timer should then be set to the time that you decided on from
your test strips. The next step would be to process the paper through the chemicals. So first put the paper in the developer for the required time and rock the tray back and forth. The Developer activates the light sensitive crystals that make up the emulsion on your paper. When the crystals come into contact with developer, any parts of the paper exposed to light will become some shade of black. After that, rinse the paper then put in the stop bath and agitate the acid. The Stop Bath is an acid that deactivates the developer, it stops the print turning black. Water and lemon juice can both be used instead of stop bath, but its not as effective. Now you rinse the print in water for 30 seconds and then put paper in the fixer. The Fixer removes the unexposed crystals on the emulsion. Then again rinse the print in water. Sometimes Hypo Clear is used to help insure uniform drying but it is not always used. Then scrape the paper with a squeegee to get most of the water off then the print for drying.
To produce a print it is best to set your f stop on the
enlarger to the smallest aperture to ensure you get the best quality. The
negative needs to be adjusted so that you can see the photo you want to print. The negative should be put in the carrier with the emulsion side down, so it should appear backwards, and upside down. Once that is done, close the carrier
and insert it back in to the enlarger. A full piece of paper is then inserted into
the easel. The timer should then be set to the time that you decided on from
your test strips. The next step would be to process the paper through the chemicals. So first put the paper in the developer for the required time and rock the tray back and forth. The Developer activates the light sensitive crystals that make up the emulsion on your paper. When the crystals come into contact with developer, any parts of the paper exposed to light will become some shade of black. After that, rinse the paper then put in the stop bath and agitate the acid. The Stop Bath is an acid that deactivates the developer, it stops the print turning black. Water and lemon juice can both be used instead of stop bath, but its not as effective. Now you rinse the print in water for 30 seconds and then put paper in the fixer. The Fixer removes the unexposed crystals on the emulsion. Then again rinse the print in water. Sometimes Hypo Clear is used to help insure uniform drying but it is not always used. Then scrape the paper with a squeegee to get most of the water off then the print for drying.
It is important to dispose of the chemicals properly when you finish. The Developer and Stop bath are generally mixed together and dumped with water down the drain.
Fixer contains the silver released from the paper during processing, and therefore needs to either have the silver removed and dumped, or disposed of as hazardous waste.
Sometimes part of your picture is unproportionately lighter or darker than the rest of your picture. If this happens, burning and dodging can be used to fix it. The concept of burning and dodging is that you allow that part of your picture to be exposed longer than the rest of it. If you want part of it to be darker, you expose that part longer and if you want part of it to be lighter, expose that part for less time. It can take a few prints before everything is just right and you may need to expose multiple areas for multiple times.
Dark room assessment
Risk
|
Who is at risk?
|
Level of risk
|
Controlled measures to be applied
|
Chemicals getting in to contact with your skin
|
Person developing the photos
|
High
|
Seamless protective disposable gloves if you must come in to contact between the solutions. Also an extra measure to be taken would be to renew gloves daily as they become permeable to the colour developing agents after a short period of time and will no longer provide protection.
|
Allergic reactions to solutions
|
Person developing the photos
|
High
|
Allergic reactions can be caused if colour developers get on to skin. So to avoid a reaction rinse your hands of the chemicals immediately and thoroughly with water from the tap.
|
Contamination
|
Person developing photos and others around you in the dark room
|
Low
|
There is sometimes a small risk of contamination by photo-chemicals. Therefore wash your hands daily using a more slightly acidic hand/skin cleaner.
|
Chemicals coming in to contact with eyes
|
Person developing photos and others around you in the dark room
|
High
|
Eyes must be protected in the dark room when handling the chemical photographic solutions. Goggles should be worn as the solution can be splashed. If eyes do come in contact with the solution rinse out immediately with water for at least 15 minutes and seek medical help.
|
Temperature of dark room
|
Person developing photos and others in the dark room
|
Low
|
Work rooms need to be adequately ventilated when the temperature lies around 30c (86F)
|
Consuming chemicals
|
People in the dark room
|
High
|
Processing solutions should be contained in suitable containers to avoid being confused with drinks. If consumed seek medical help immediately. Also another precaution is to not consume food or drink in the dark room you may swallow the chemical photographic solutions by mistake. If you do swallow solution rinse out your moth immediately with water and drink salt water to prevent vomiting. Then seek medical attention immediately.
|
Cleanliness of workspace
|
People in the dark room
|
Medium
|
Keep the dark room clean and clean up chemical spills immediately when they occur, as there is a risk that dry chemicals can become air born and be inhaled. Also spills can contaminate the processing and printing workspaces and the other solutions.
|
Injuries from paper cutter
|
Person handling the cutter
|
Low
|
Rotary blade cutters are generally the safest however still take care when using them. Do not use the type of cutters with bladed handles as they are particularly dangerous when working in the dark.
|
Examples of editing photographs in Photoshop
Cropping
This is the original photo, using the crop tool on Photoshop you can adjust the photo so you see only what you want to. So now by cropping it I can take out the surroundings and just have the boat as my image.
Using colour Palettes
Using Photoshop you can create your own custom colour palettes as well as use there own. From a photograph you can identify its colours using the eyedropper tool and make them in to swatches to put in to a palette so you can use them for other creations on Photoshop. You can put together a colour scheme/ theme palette like I have done below.
 I have chosen to use an image of an autumn trees scene to sample colours from. I used the eyedropper tool to extract the colours from the image then click on the arrow in the corner of the swatches box and add a new swatch to the palette.
Once I've collected all the colours I want I can save them as a swatch set. Click on the arrow on the swatch set and select save swatches, it will let you name the palette and then save it so you can use the colours again.
Stamps
The Photoshop clone stamp tool allows you to copy one area of an image and copy it onto another area. To do this you need to open an image in Photoshop.
Then click on the clone stamp tool from the toolbar. You can set your brush options (located at the top tool bar). You can adjust the brush size and shape, opacity, flow and blending modes. To select the area you want to copy from, move your mouse to the area you want to duplicate and Alt-click (Windows). The cursor will change to a target and you can click the exact spot you want to start copying from. To retouch the image using your stamp , drag the brush over the area you want to use the stamp and it will start to appear on the photo.
Lasso tool
This is the original image I will use the lasso tool on. The lasso tool is basically a more precise way of cropping an image. Its not perfect but you can get quite close to the edges of an image. When using the lasso tool if you press alt the lasso has a minus on it which means you can move the crop line back if you highlighted too much and pressing shift does the opposite, if you need to highlight more draw around the area you missed return the pencil to the point in which you started drawing and it will be included in the crop line. When you've finished using the lasso tool, press Ctrl + C to copy your selection and I have chosen to paste my cropped image of a Christmas tree in a snow scene with other trees covered in snow.

Layering
You can add more than one layer to a page in Photoshop. You can use the tool bar and click the layer tab and either add a new layer or duplicate one of your layers. Here are two different layers that I've overlapped and changed the opacity so you can see the two layers.
Health and Safety research
The health and safety act (1974) is a primary source of legislation that covers occupational health and safety in Great Britain. The act states the general duties an employer has towards their employees and members of the public, and employees to themselves and to each other. The law requires good management and common sense to look at the risks and take sensible measures to resolve them.
The control of substances hazardous to health regulation (2002) states the general requirements on employers to protect employees and members of the public from substances that are hazardous to health. To prevent or reduce workers from the exposure to hazardous substances you should find out what the health hazards are in your work place and decide how to prevent harm to health. This should be done by providing controlled procedures to reduce harm to health in these situations and make sure employers and employees follow them. Also provide training to employees about health and safety in the workplace.
The Health and Safety (Display Screen Equipment) Regulations 1992 aims to protect the health of people who work with DSE. DSE has become one of the most common kinds of work equipment used and that is why the Regulations were introduced. According to surveys, a high number of DSE workers reported aches and pains or eye discomfort. These pains are sometimes called upper limb disorders (ULDs), a common one being RSI. However, if users follow controlled practice and set up their workstations properly as well as taking breaks during prolonged use of DSE these risks can be prevented.
Risk assessment for using computers for digital manipulation
When using computers for digital manipulation, you need to be aware of the risk of developing a repetitive strain injury if spending long periods of time on the computer. Also it is not good for your eyes to be at a computer for too long. You must also make sure you are comfortable, so sit in an appropriately adjusted chair to avoid any muscle pain. Keep liquids away from the computer to avoid injuries caused by damage to the electricity.


 This is a photography of Embankment Place taken in 1990. The photographer took this during a sunset to capture the beauty of the red sky ad create a calm atmosphere and the lights from embankment illuminate the image and create a minimalist reflection against the river. The lighting and angle of the photo allows you to see the different texture and layers of the photo.


